
TEMPORARY ANCHOR CONSTRUCTION PROCESS
Neo SSC-TA (Temporary Anchor) is a temporary anchor system that cannot be dismantled, commonly used in the treatment of deep excavations in combination with pile walls or diaphragm walls in temporary anchorage construction.
The basic principle in the design of the ground anchor system is to create two connection points, one connected to the retaining structure, the other firmly anchored into the rock to transmit traction through friction (or stickiness). grip) at the contact surfaces between the anchor and the rock. Ground anchor includes free length, anchor length, tensioner and anchor head.v
Advantages Disadvantages of Temporary Anchor System (No Dismantling)
Advantage
- The construction site for temporary anchorage of the tunnel is wide, can arrange many flexible site facilities
- Construction progress is fast, can be constructed in parallel with the excavation process
- The cost can be cheaper than the anti-splash system.
Defect
- Khó thi công neo tạm thời khi có công trình liền kề.
- Công nghệ thi công và thiết kế phức tạp, yêu cầu nhà thầu thi công có kinh nghiệm
Temporary Anchor Construction Process
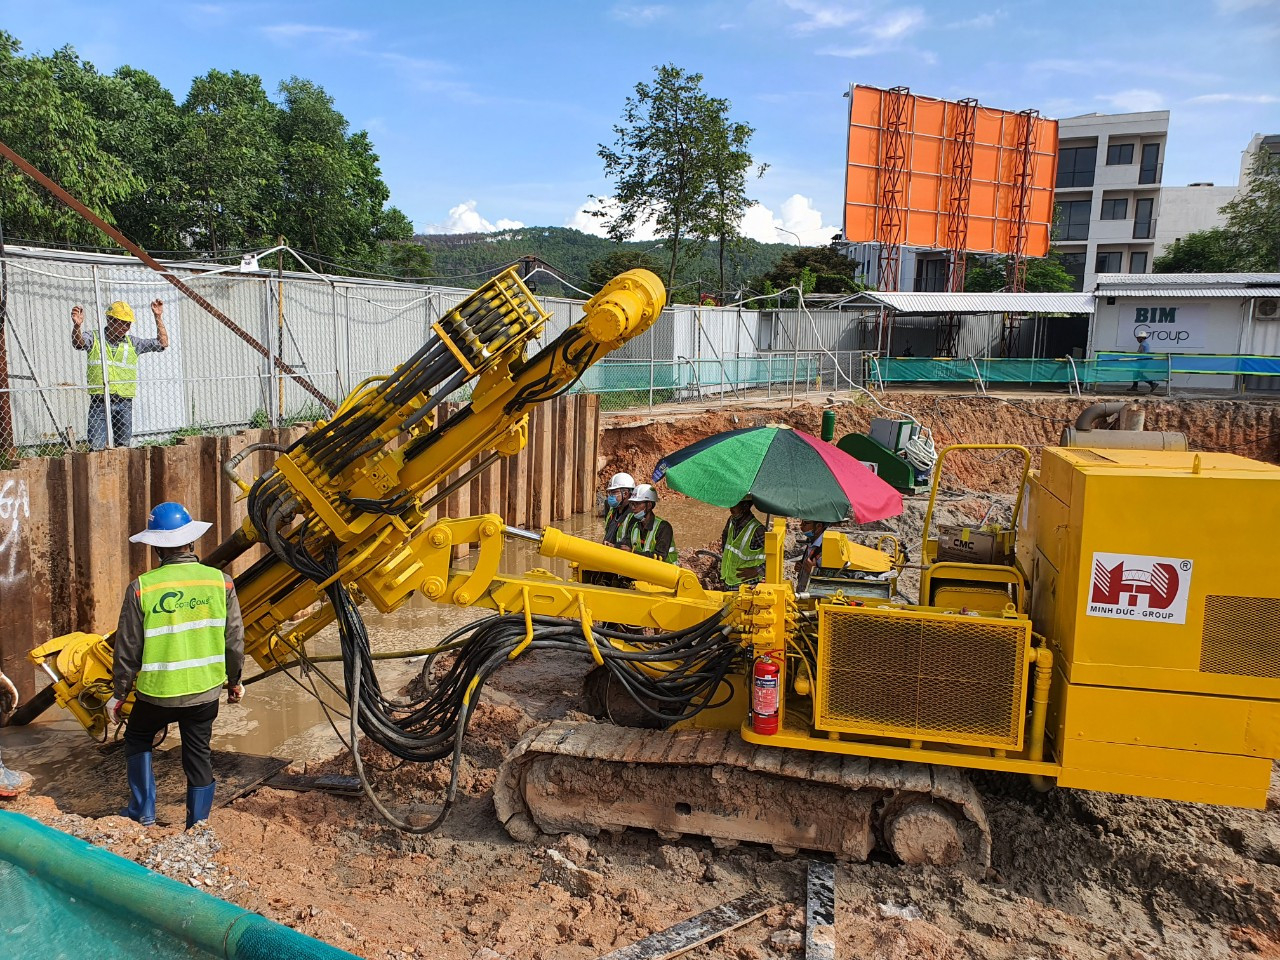
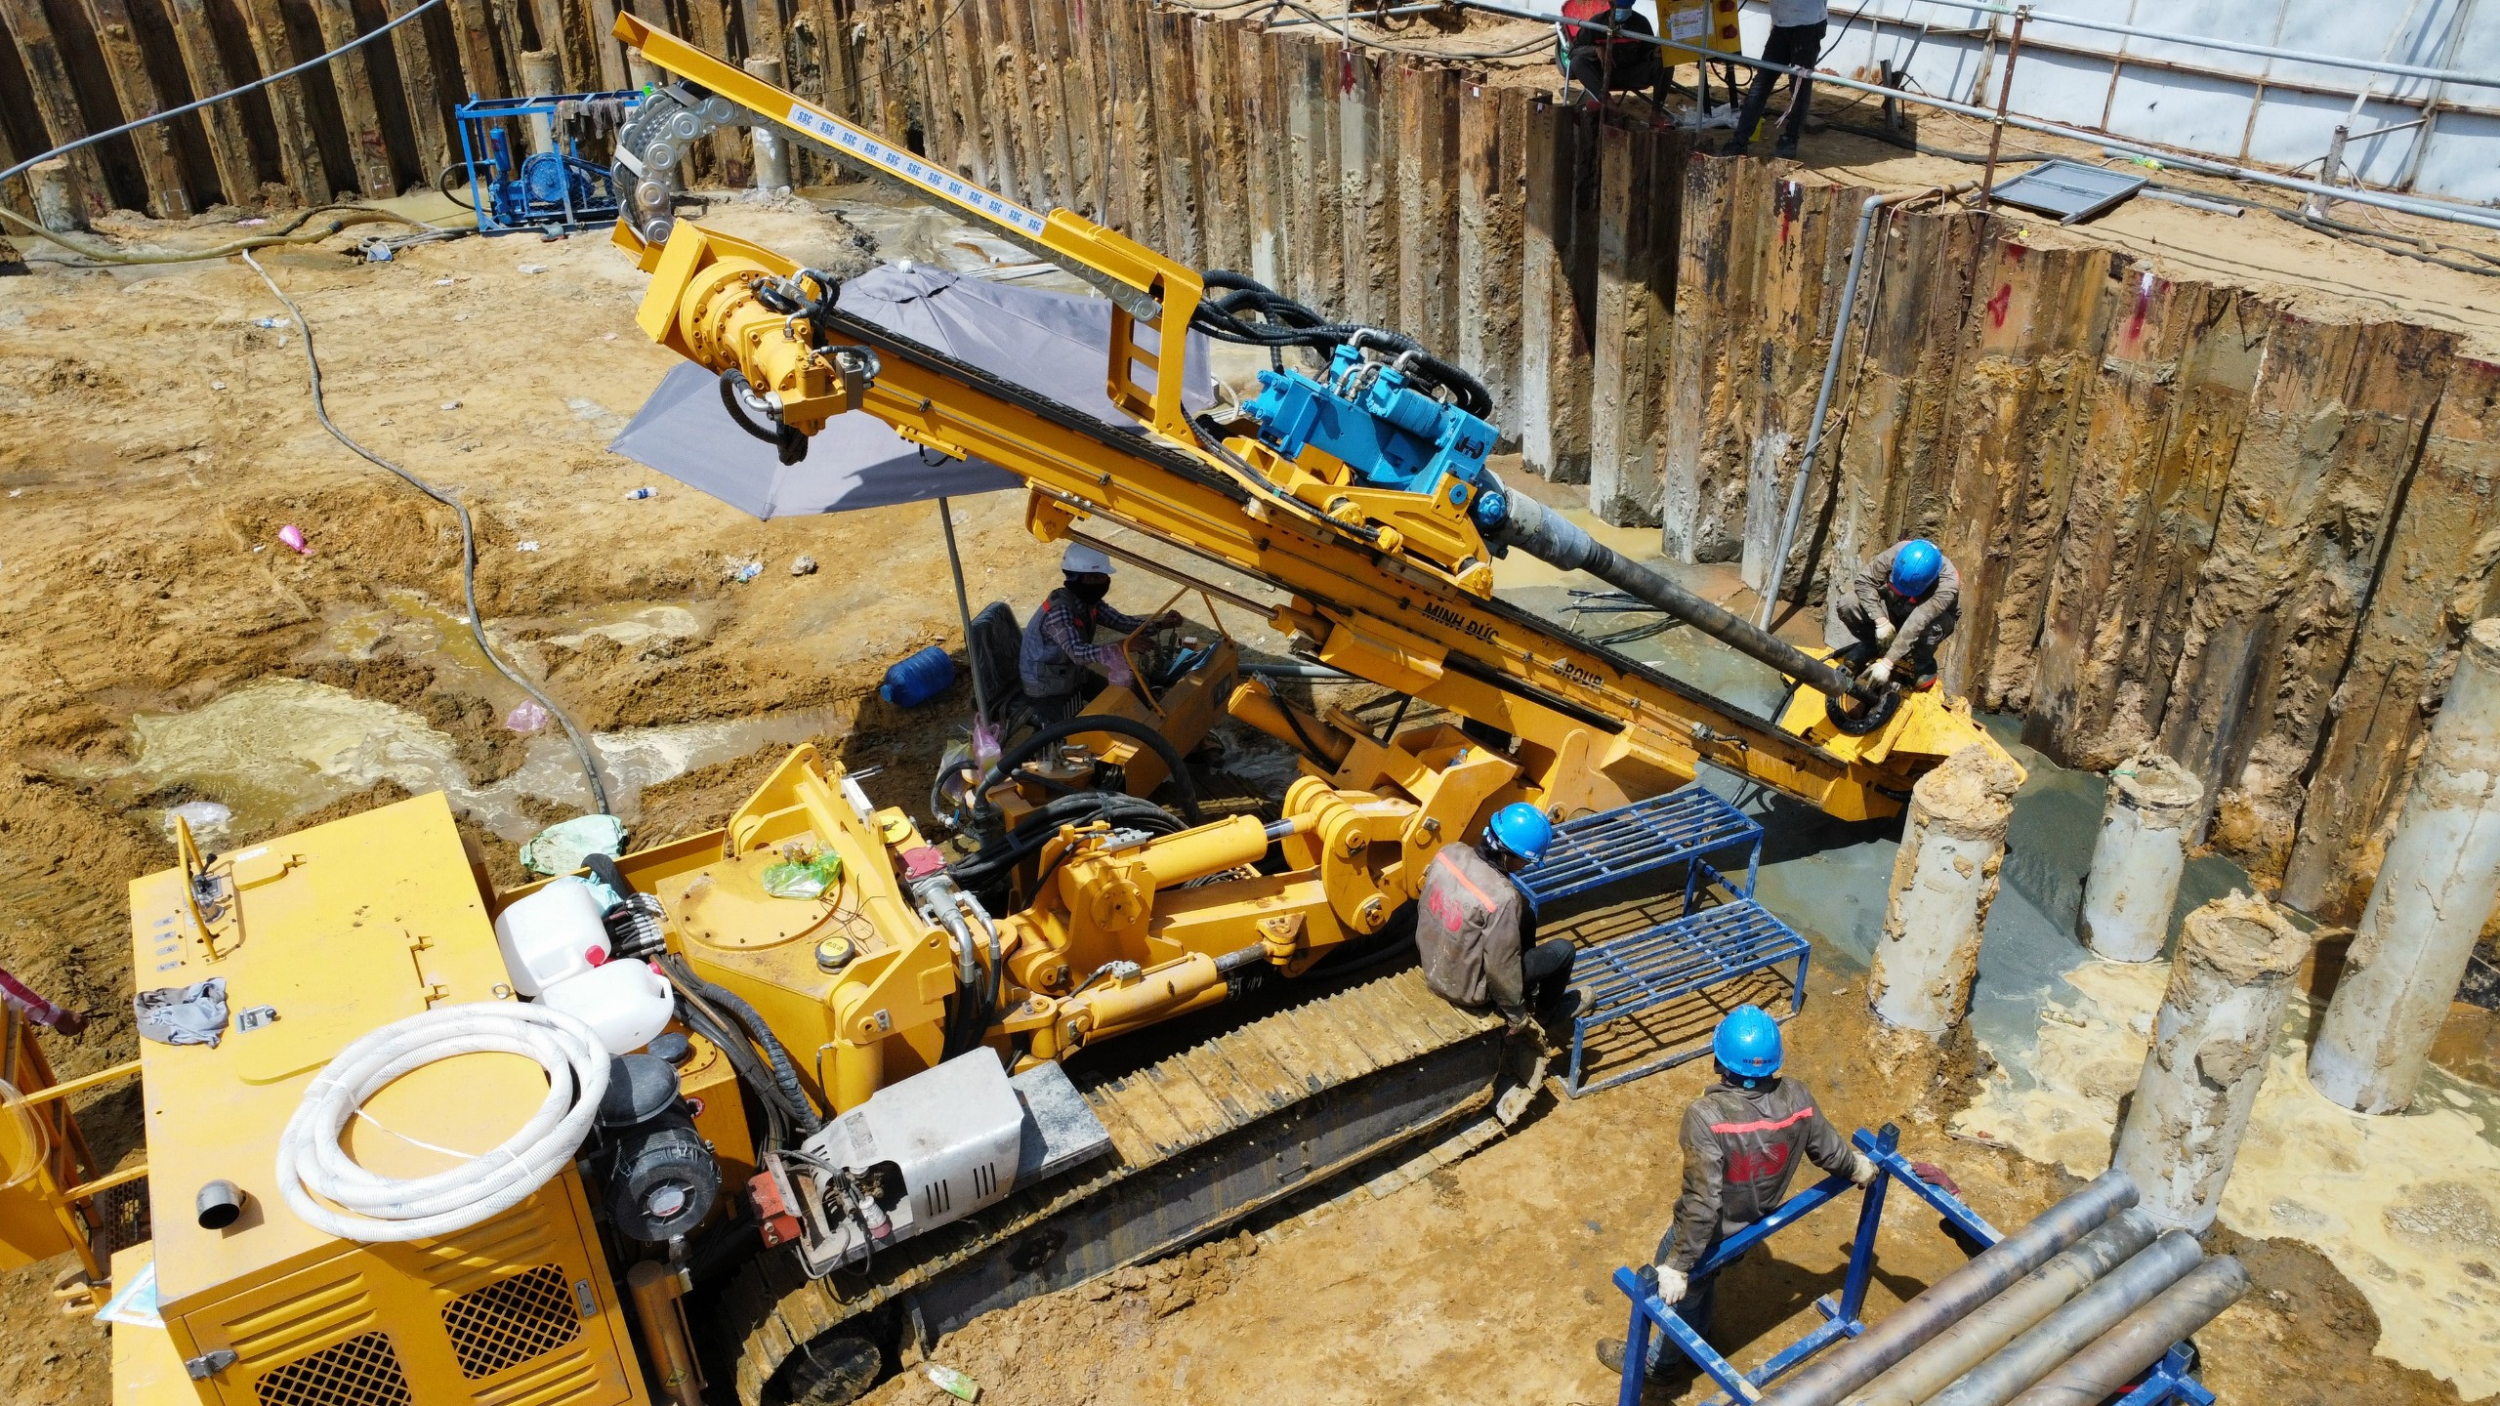
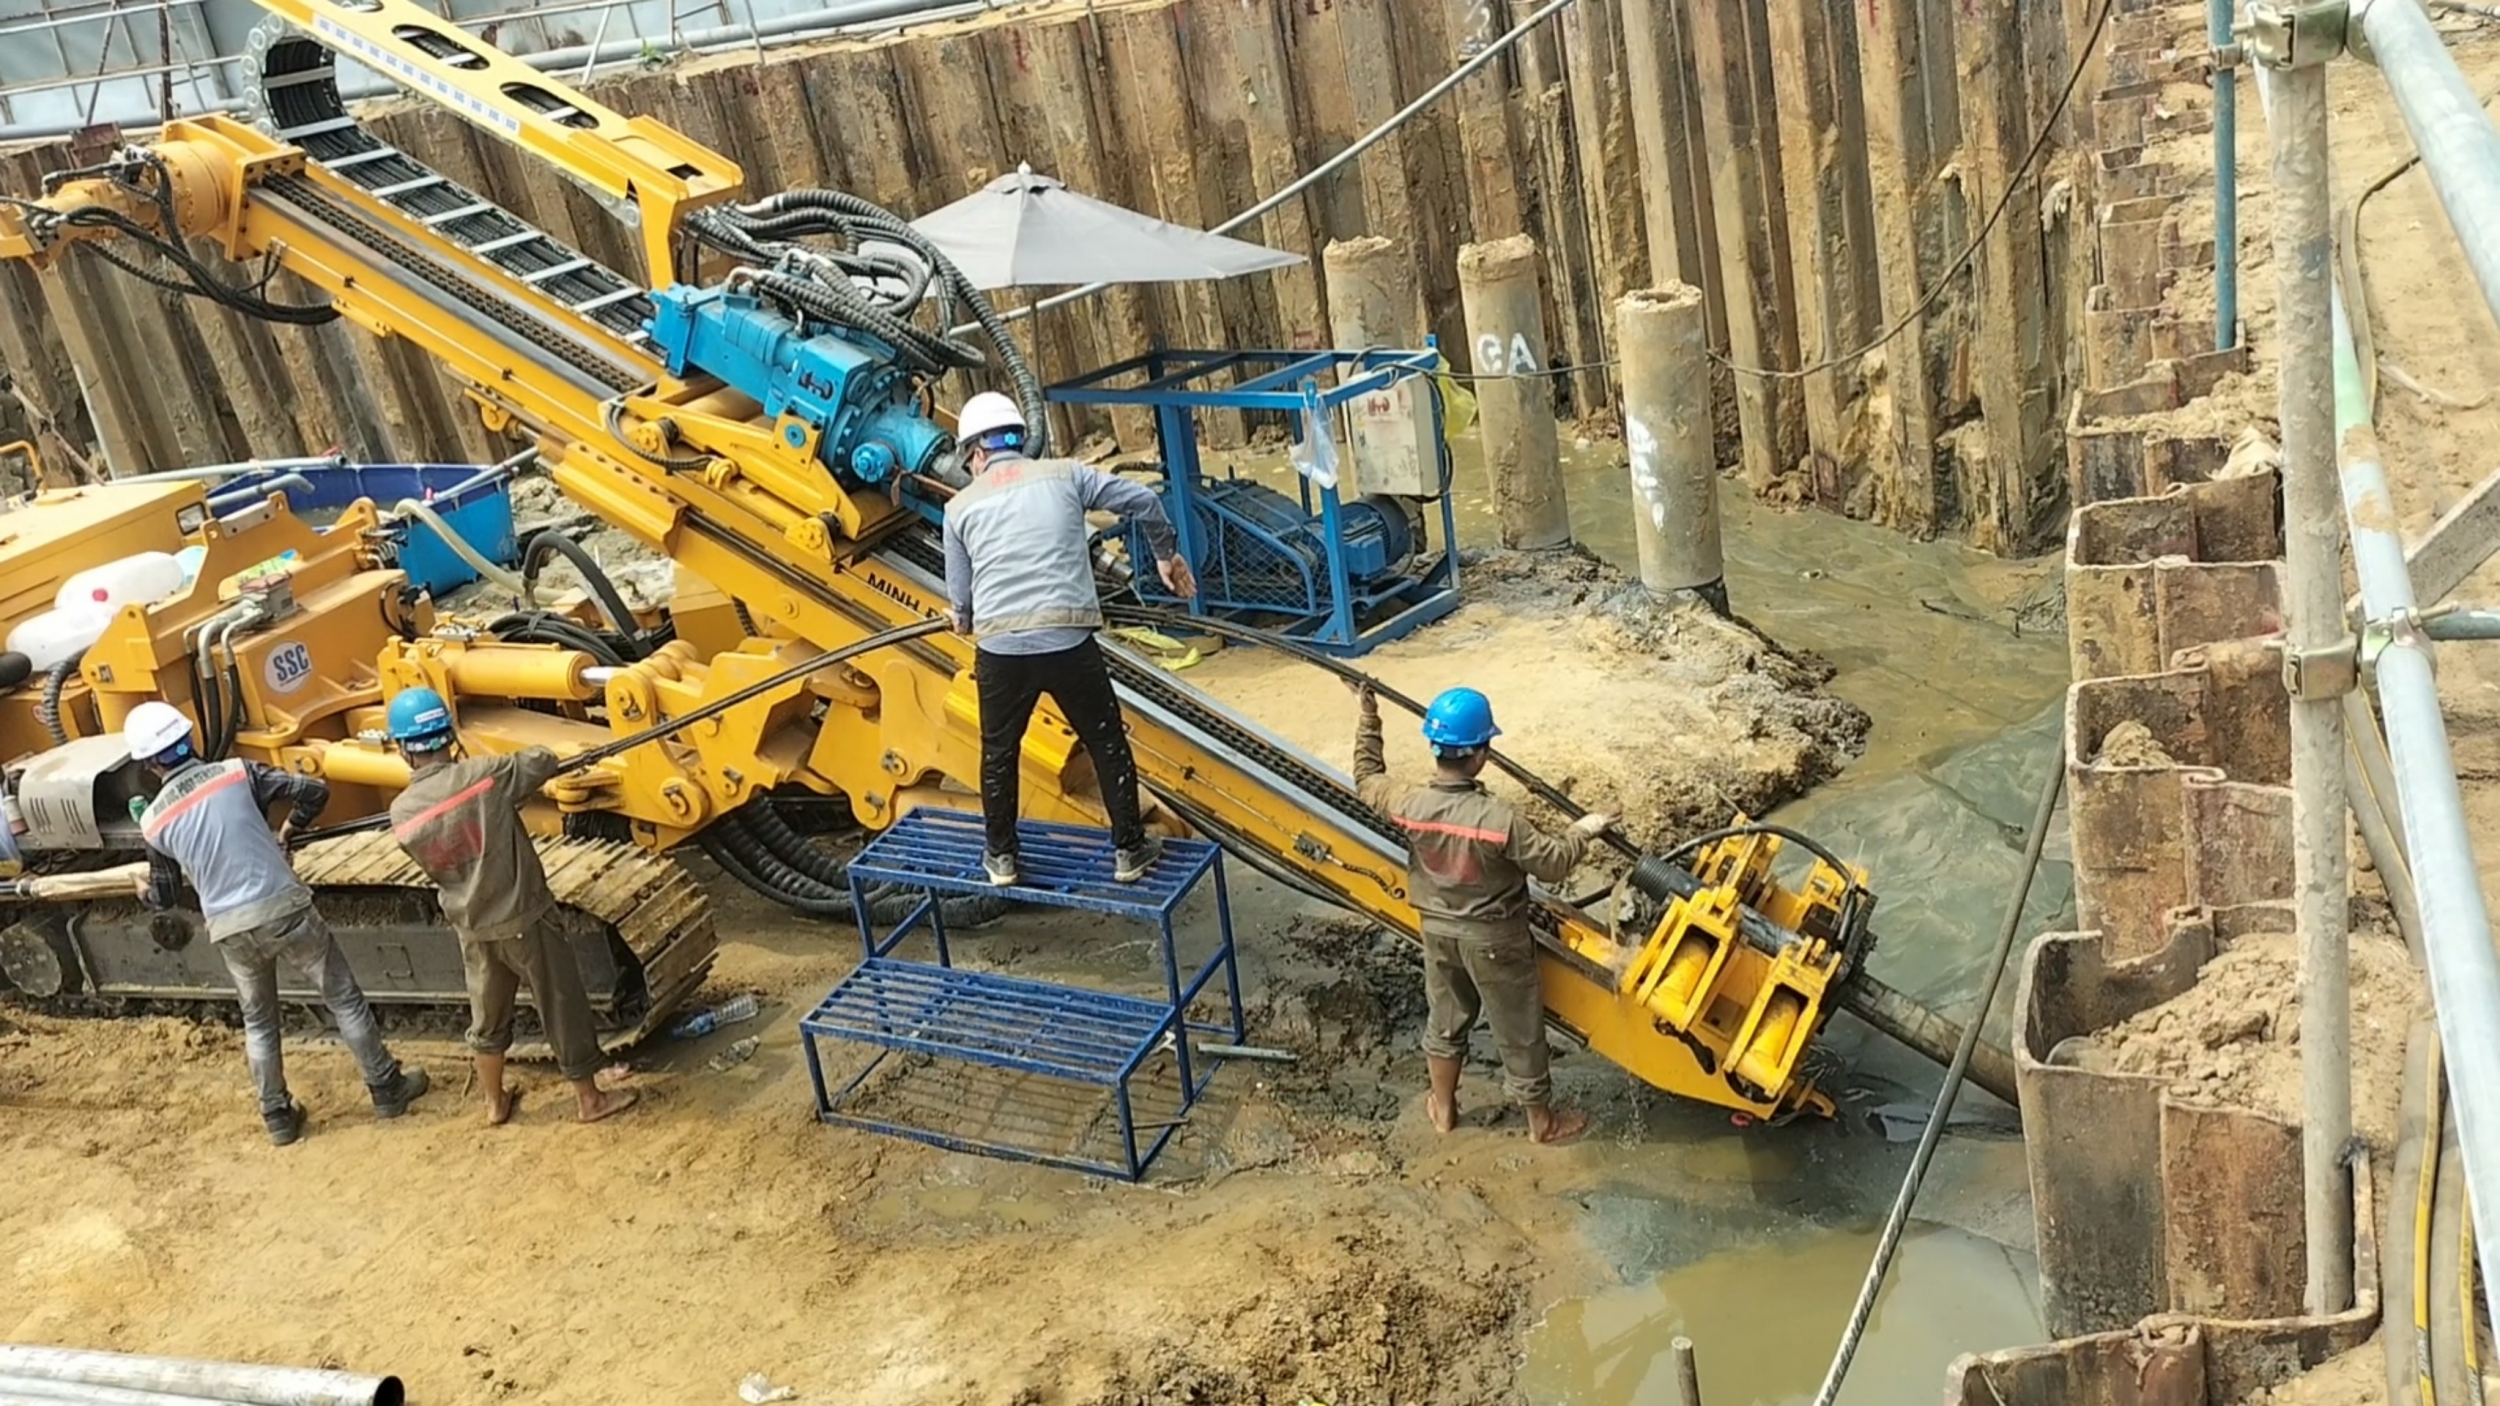
Drill Hole
Top impact and/or rotary drilling technology is used to penetrate soft and loose soil. Temporary bulkheads are installed to the base of soft ground that can cause borehole collapse and are removed upon completion of installation.
The rotary drilling technology that combines the inner rod and the outer wall pipe will also be applied in case the hole has a large angle of inclination, at which time the workpiece cannot be released by conventional rotary drilling. Drill hole diameter 140~160mm with designed length and angle.
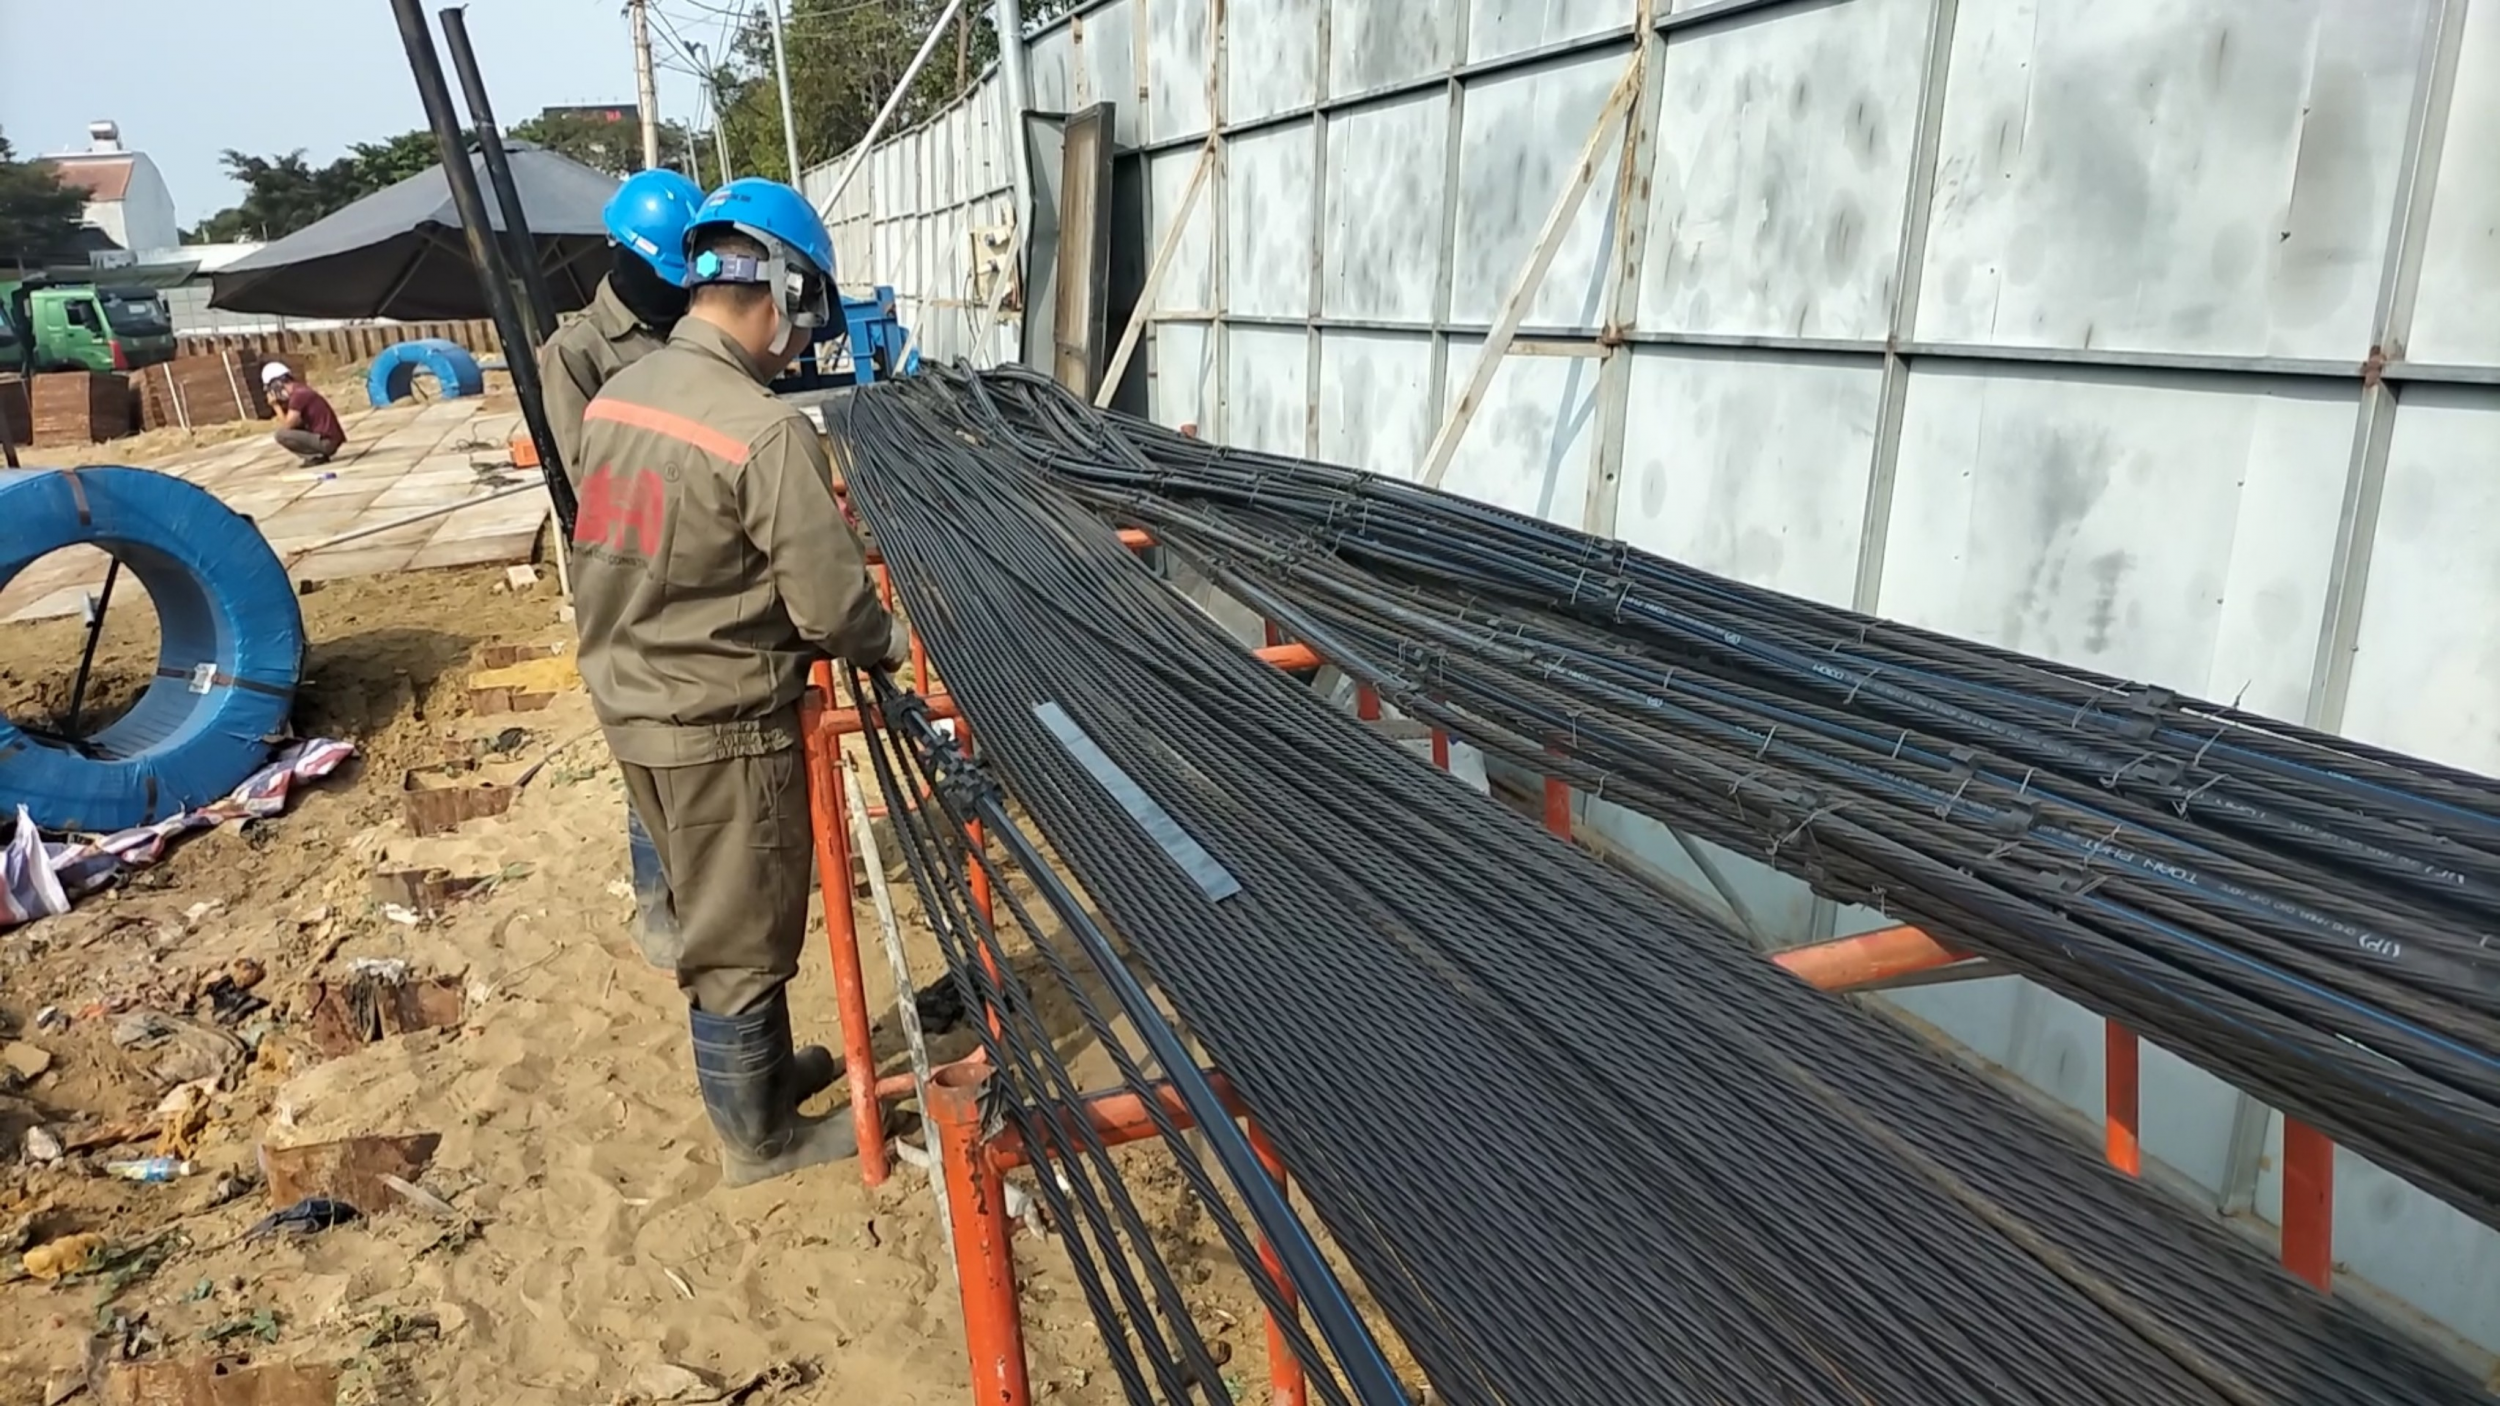
Crafting Temporary Anchors
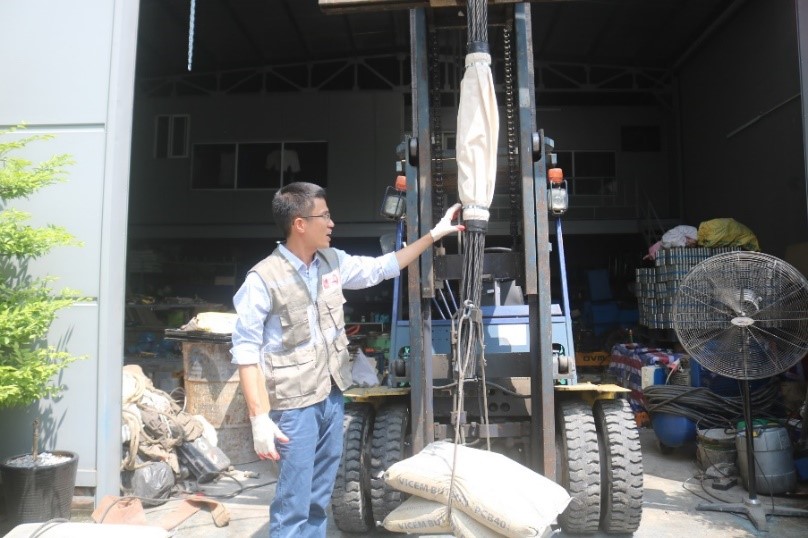
The required ground anchors are fabricated and assembled in the workshop or fabricated in a machining yard on site. Anchor heads and other construction components must be stored in a warehouse with suitable pallets or crates to protect them against weather and climate. Ground anchors must not be placed directly in the ground and necessary protective measures should be taken to prevent damage to cable anchors.
- All materials such as cables, grout, and anchorage must be tested in accordance with project specifications and site regulations.
- The cable reels will be lifted into the cable tie by a crane. The cable reels are placed on the ground at a convenient location for cable routing. The cable inside the core of the cable reel is pulled out and machined into an anchor
- Before cutting the cable, the certification and inspection papers of the cable reels must be verified and compared with the records kept in the project office.
- Cut the cable when the cable length is equal to the required length (including the 1 m tension service length). Cable cutting with oxy-acetylene or similar thermal methods is not permitted. Disc cutter is recommended.
- Record the number of cable reels and the number of cables in the cable line in the “cable manufacturing report”.
- Produced cable bundles should be identified by tags
- The cable routing area is isolated by warning tapes and warning signals at both ends of the cable line during installation to ensure that there are no unauthorized persons in the work area.
- Cable cutters must be installed in a clean area
Temporary Anchor Installation
- In the case of drilling, it is carried out by a drill holding the wall with a support pipe. The temporary anchor will be released before the entire support pipe is withdrawn and a layer of mortar will be pumped from the bottom up to the mouth of the drill pipe.
- The length of the borehole during drilling should be checked through the number of struts and the length of the borehole after drilling to the design length should also be checked before allowing anchoring during the temporary anchorage construction.
- In case drilling is done by DTH drilling method or internal drilling rod. The borehole length is determined through the drill rod segments that include drill rod connectors with the drill bit.
Mortar Pump In Temporary Anchor Construction
The purpose of the grout pump is to supply grout for the entire length of the anchor bulb. This also helps to stabilize the drilled holes. The grout also fills the void, removing any water in the hole, if any.
Materials For Pumping Mortar
- Water: Only use clean water for use
- Cement: Portlang PCB 40 . Cement
- Additives attached without shrinkage, increase flexibility
Mortar Pumping System
The mixer consists of a double tank to perform grout mixing, and a container to enable continuous mixing of the grout. This tank is connected to the pump located at the bottom of the double tank. The grout will be delivered to the pump. The grout is properly mixed in the barrel for about 3-4 minutes until the grout is uniform. After mixing, the mixed mortar is passed through a high-pressure pump to pump into the anchor pipe. A valve shall be fitted between the pump and the anchor inlet.
Mortar Pumping Process for Temporary Anchor Construction
- Before grouting, the grout hose for the anchor is checked and if necessary rinsed with clean water or an air compressor to remove any debris etc.
- Water, cement and additives required for grouting are kept ready.
- Cement, water and admixtures are mixed in the mixing tank of the mixer in the approved proportions. This mixture will be prepared and mixed to form a homogeneous mixture. The mortar after mixing will be transferred to the pumping process.
- All grouting measures shall be taken so as to fill the grout.
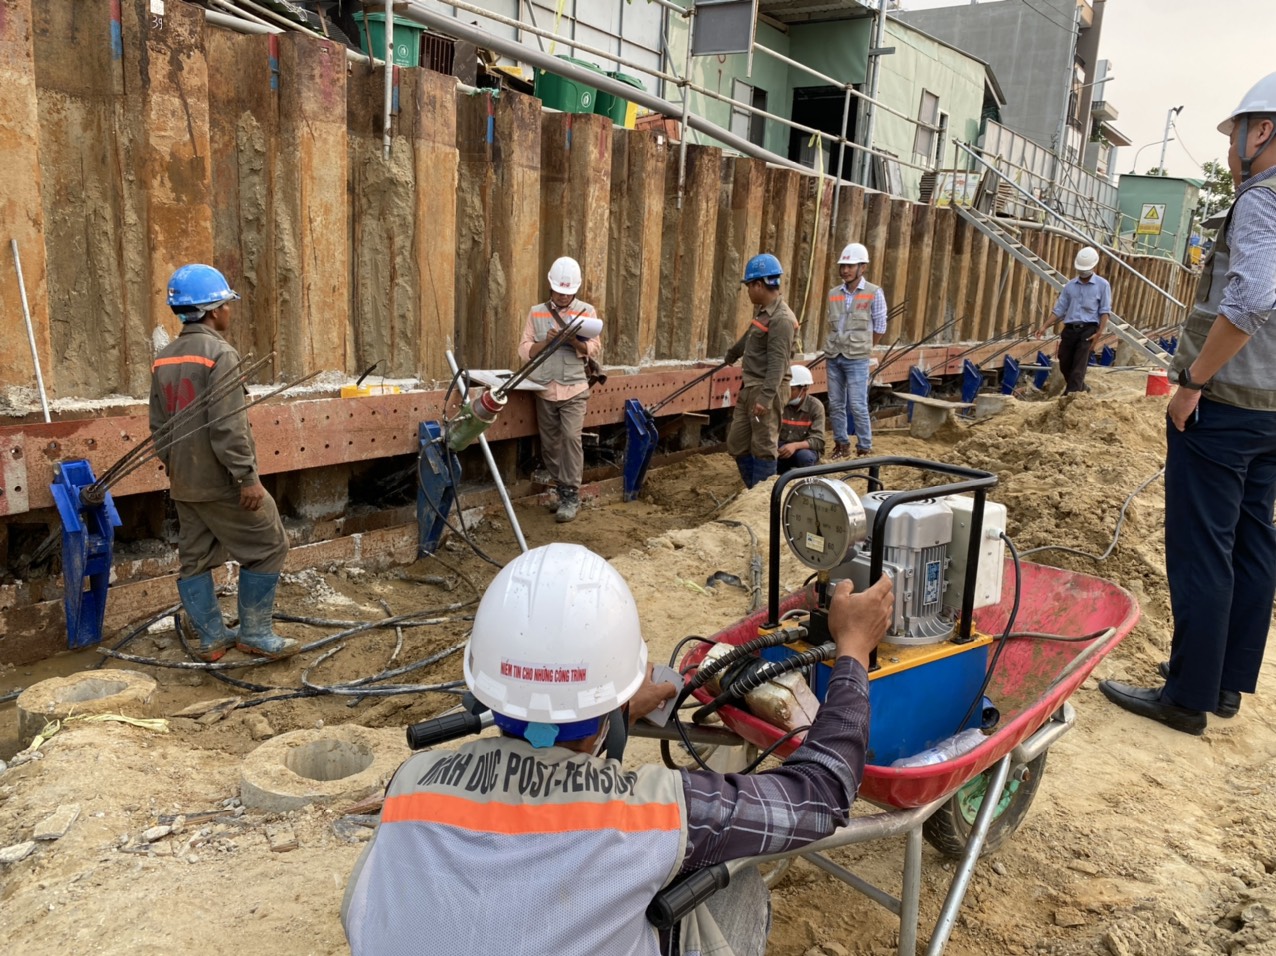
Temporary Anchor Tension
- Tensioning will not commence until the grout has attained a compressive strength of 27MPa as shown in the design drawings and the contractor has received instructions to allow tensioning to commence in accordance with the customer's written request.
- Pay attention to check the expiration date of the certificate of size inspection. If it is more than 6 months, this equipment needs to be re-tested before tensioning in the field.
- Carefully check the working condition of the hydraulic pump, jack and measuring device, power supply, hydraulic hose, connector to ensure the whole system works well under tension.
- Anchor supports and spacers are installed directly on the guide rails of the anchor.
- Install the anchor head on the support and wedge over the anchor holes.
- Install the hydraulic jack in the center above the anchor head, connect the pump and the pressure gauge.
- Checking working anchors on jacks with working wedge positions behind in temporary anchor construction
- Carry out cable tensioning according to the tension and sequence specified in the attached drawings
- Tensioning is carried out in 4 levels of tension (P): 25%, 50%, 75%, and 100% of the design tensile force. These 4 steps need to be performed continuously for each cable line
- During tensioning, if the piston of the jack comes out of its full stroke, but the initial pulling force (P) has not been achieved, the tensioning will be paused, then the pressure is released, the jack piston returns and then continues to pull. stretch
- The steps of the tensioning process are as follows:
- Record the tension and elongation of the cables in the “Report of the results of the ground anchor tension”
- The tensile and elongation report will be calculated, completed and checked by the Temporary Anchor Construction Project Engineer, before submitting to the stakeholders for approval.